A new densimeter fails or succeeds in its first thirty minutes, and almost every bad reading in week one traces back to setup shortcuts.
Unboxing a densimeter feels simple until the first reading wobbles. The tank, hanger, water level, and surface all influence the result, and small setup mistakes compound into confusing numbers. This guide walks through site selection, leveling, filling, hanging the basket, settling the water, and the first calibration check, so your first real purchase is based on a number you can trust.
- Choose a level, vibration-free table away from drafts, fans, and busy foot traffic before you unbox.
- Use distilled water at room temperature and let it settle for at least ten to fifteen minutes before the first reading.
- Run the calibration weight and a known test piece before you buy anything with the new machine.
Stable site
A heavy, level table beats a thin counter that flexes when staff lean on it.
Correct water level
Follow the manual's fill line so the hanger sits at the intended immersion depth.
Settling time
Fresh water carries dissolved air and temperature differences that need time to even out.
Baseline log
Record the first calibration and a known-piece reading so you can detect drift later.
Site, level, and unboxing
Start with the table. A densimeter weighs fractions of a gram while a basket hangs in water, so any surface movement shows up as a changing number. Pick a solid table, away from air-conditioning vents, doors, and fans. Keep the machine out of direct sun, which warms the water and the load cell unevenly. Remove the transport locks or screws if the manual mentions them, and place the base on its feet. Use the built-in level indicator or a small bubble level, and adjust the feet until the machine sits flat.
Check the contents against the listing before you start: tank, hanger or basket, calibration weight, power adapter, and manual. Missing items are a common complaint in Amazon-style listings, and it is far easier to claim a missing accessory on day one than weeks later. Photograph the box contents and note the serial number. Wipe the tank and hanger with a clean, lint-free cloth to remove packing dust or oils that would otherwise create bubbles. Skip household sprays and solvents, which can craze acrylic.
Filling, hanging, and settling
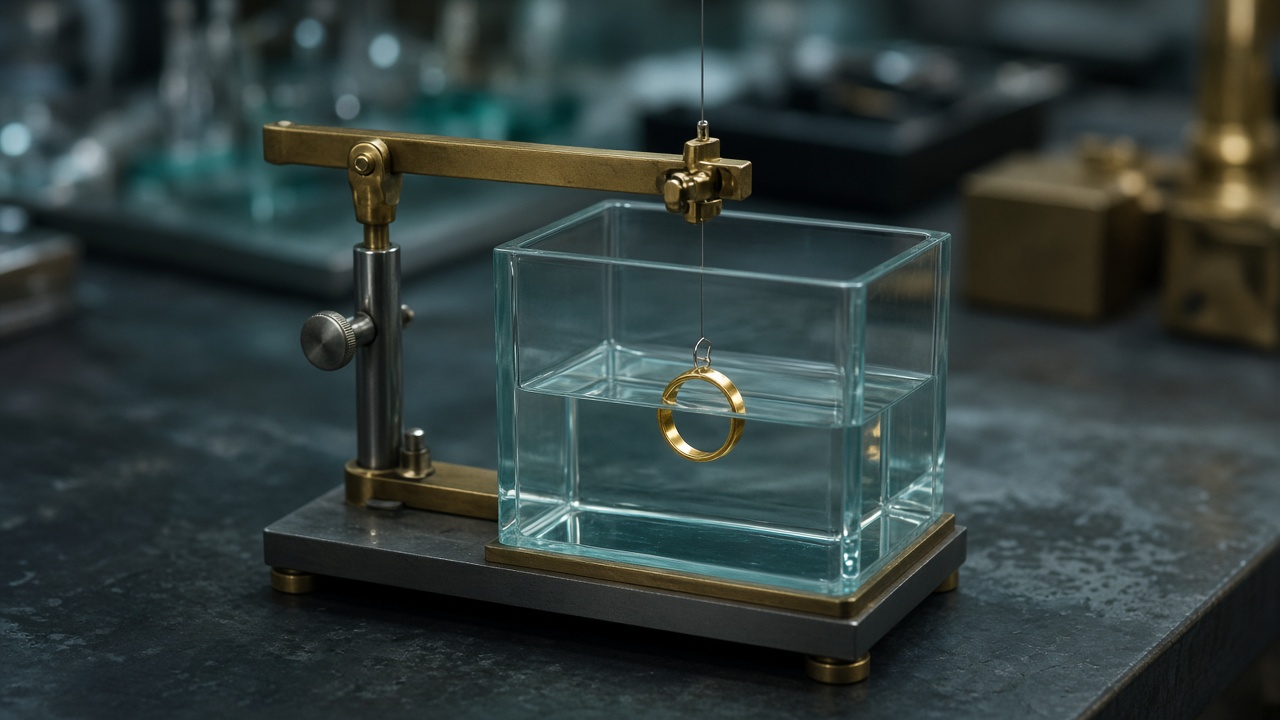
Use distilled water at roughly room temperature. Fill to the line given in the manual so the wire or basket sits at the intended depth, because immersion depth affects the surface tension effect on the hanger. Lower the basket slowly to avoid trapping air, tap it gently to release bubbles, and make sure it does not touch the tank wall. Then leave the system alone for ten to fifteen minutes with the power on, so the electronics and the water both stabilize.
After settling, follow the manual's tare or zero procedure and run the supplied calibration weight. If the number does not match, repeat after rechecking level, water line, and contact with the walls before assuming a defect. Finally test a known item, such as a piece of sterling silver or a certified bullion coin you trust, and write the reading in a notebook. This baseline lets you tell later whether a strange result belongs to the sample or to the machine.
- Never test on a wobbly table or beside an air vent.
- Do not top up with tap water; use the same distilled source each time.
- Keep the manual and the first baseline readings in a drawer near the machine.
First-day checklist
Print this checklist and tick each item before the first customer transaction. A fifteen-minute routine on day one prevents weeks of confusion and protects your first purchases from avoidable errors. Keep the signed checklist in a folder with the manual and calibration records.
| Step | What to confirm |
|---|---|
| Site | Level, solid table, no drafts |
| Contents | Tank, hanger, weight, adapter, manual |
| Water | Distilled, at line, bubbles cleared |
| Settling | 10 to 15 minutes powered on |
| Calibration | Weight passes; baseline logged |
Recommended densimeters for this workflow
| Product | Best for | Price tier | Editor view | Amazon |
|---|---|---|---|---|
| RODIETO 600 g Gold Purity Densimeter | Pawn and mixed jewelry intake with heavier solid chains | Value | Editor assessment: Strong | Check Latest Price → |
| Alfa Mirage GK-300 | Jewelry counters buying solid gold under ~250 g | Premium | Editor assessment: Excellent | Check Latest Price → |
| Lissontine Shop-600 g Densimeter | Shops comparing 600 g kits with optional print workflow | Value | Editor assessment: Solid | Check Latest Price → |
Best Value / Best for Pawn Capacity
RODIETO 600 g Gold Purity Densimeter
- Best forPawn and mixed jewelry intake with heavier solid chains
- Price tierValue
- Editor viewEditor assessment: Strong
Best Overall for Jewelry Desks
Alfa Mirage GK-300
- Best forJewelry counters buying solid gold under ~250 g
- Price tierPremium
- Editor viewEditor assessment: Excellent
Best Budget / Runner-Up 600 g Kit
Lissontine Shop-600 g Densimeter
- Best forShops comparing 600 g kits with optional print workflow
- Price tierValue
- Editor viewEditor assessment: Solid
Best Value / Best for Pawn Capacity
RODIETO 600 g Gold Purity Densimeter
Key takeaways
- 600 g headroom for pawn-weight solid chains
- Shop-class 0.001 density without lab pricing
- Confirm seller, accessories, and exact capacity
Pawn and mixed jewelry intake with heavier solid chains
You need Japan-brand prestige more than usable capacity
Quick snapshot
Pros
- 600 g headroom covers most solid chain intake
- 0.001 g/cm³ density resolution is the shop-class sweet spot
- Karat / purity / density in one workflow
- Usually ships as a complete tank + hanger kit
Cons
- Generic brand—seller quality and support vary
- Listing titles can be noisy; you must confirm exact capacity
- Not a tungsten-proof bar tester on its own
- Lower brand recognition if ownership wants “made in Japan” optics
Why we picked it
Why it earns the badge
RODIETO’s 600 g class is our best value pick because capacity is the feature that actually saves pawn and mixed jewelry desks from buying twice. A beautiful 300 g branded unit that cannot weigh your heaviest regular chain is a failed purchase—no matter how clean the karat UI looks in the product photos. This kit targets the real workflow: solid scrap, solid chains, fast karat/density/purity screen, and a complete tank + hanger setup so you are not hunting accessories after the box arrives.
Who it is ideal for
Ideal for pawn shops, mixed jewelry buyers, and scrap desks where solid intake regularly lands between 200 g and 500 g. The 0.001 g/cm³ density resolution is the shop-class sweet spot: fine enough for solid karat banding without paying lab-SKU prices. Managers also get a second number (density or purity %) when karat mode looks off, which helps when a second staffer re-checks a disputed piece.
Who should skip it
Skip it if brand prestige is a boardroom requirement—“made in Japan” optics matter in some retail ownership conversations—or if you only ever buy light rings under ~150 g. In that lighter jewelry-only case, a 300 g premium unit may feel cleaner on a glass retail counter and leave more budget for training and distilled-water discipline. Also skip any densimeter as a standalone answer for bullion bars you suspect are tungsten-filled; density alone will not settle that fight.
What real buyers get wrong
Cross-check Amazon seller ratings and the in-box list (scale, tank, hanger, power, any claimed printer) before you checkout. Across generic 600 g densimeter listings, the honest low-star complaints cluster around missing English instructions, accessories that were pictured but not shipped, confusing multi-SKU titles, and buyers who tested hollow or gem-set jewelry then blamed the machine. Those are avoidable with a pre-purchase checklist: confirm capacity on the live listing, screenshot the accessory list, decline hollow/gem-set pieces at intake, and treat the result as a first pass. Do that, and a value 600 g kit like this becomes the workhorse most pawn desks actually need.
Key specs → desk benefits
600 g capacity
Fewer “piece won’t fit” moments on pawn days when solid chains run heavy.
0.001 g/cm³ density resolution
Fine enough for solid scrap karat banding without paying lab-SKU prices.
Karat + purity + density display
Managers can spot-check a second number (density) when karat mode looks off.
Best Overall for Jewelry Desks
Alfa Mirage GK-300
Key takeaways
- Best when solid jewelry stays under ~250 g
- Karat language staff can explain to customers
- Skip if heavy chains already crowd 300 g
Jewelry counters buying solid gold under ~250 g
You regularly buy heavy chains or bars over 300 g
Quick snapshot
Pros
- Karat modes built for gold buying—not a generic lab densimeter UI
- Japan-made brand that shop owners recognize for warranty optics
- Doubles as a gram scale so trade-ins stay on one footprint
- Non-destructive first pass—no acid stains on retail-ready pieces
Cons
- 300 g ceiling fails many pawn-weight solid chains
- Premium price vs generic 600 g Amazon kits
- Still cannot test hollow or gem-set jewelry (physics limit)
- Some buyers complain about learning the water-hang workflow on day one
Why we picked it
Why it earns the badge
We picked the Alfa Mirage GK-300 as the best overall starter for jewelry stores because it is built around karat language, not just a bare density number. On a retail counter, that matters more than most buyers admit on day one. A salesperson can take a solid trade-in, run the air weight and water weight, and talk in K14 / K18 terms the customer already understands—without translating a raw density chart mid-conversation. The Japan-made positioning also helps when an owner asks why you are not buying the cheapest no-name kit on Amazon. Warranty optics and brand familiarity reduce pushback from partners who have seen too many generic electronics fail after a few busy seasons.
Who it is ideal for
This machine is ideal if your solid intake mostly stays under about 250 g: rings, solid bracelets, light scrap lots, and estate pieces that are clearly solid metal. Treat the 300 g ceiling as a hard workflow limit, not a marketing number. If your desk routinely sees thick Cuban chains, stacked scrap bags, or solid pieces that regularly flirt with 280–300 g, capacity—not brand prestige—should win, and you should move to a 600 g shop densimeter before you outgrow the GK-300 mid-purchase.
Who should skip it
Who should skip it: pawn shops with heavy-chain days, coin desks handling bars, budget-first buyers who only need a rough karat band once a week, and anyone who thinks a densimeter will replace acid or XRF for hollow or gem-set goods. Manufacturer guidance is blunt on the physics limits: hollow jewelry, stone-set pieces, and metals with density very close to gold (including tungsten cores in bars) are outside the trustworthy zone. Those are not “bugs” in the GK-300—they are limits of Archimedes testing itself.
What real buyers get wrong
When you dig past star ratings on Amazon-style densimeter listings, the recurring 1-to-3 star themes are rarely “karat mode is fake.” They are operator and expectation problems: air bubbles clinging to textured scrap, the sample touching the tank wall, testing hollow electroformed jewelry that returns falsely low density, missing English manuals on generic kits, and buyers who expected an assay certificate instead of a first-pass screen. Train solid-sample rules on day one, keep distilled water and a soft brush at the tank, and use a written threshold for when density results escalate to XRF. Done that way, the GK-300 becomes a reliable buyer aid on a jewelry desk rather than a mysterious black box that staff avoid after one awkward customer conversation.
Key specs → desk benefits
300 g capacity / 0.01 g weight resolution
Stable enough for solid rings and most bracelets, with gram-scale precision that keeps scrap payouts honest.
K9–K24 karat + purity % modes
Staff can explain a karat band to a customer in one sentence instead of translating raw density charts.
Densimeter + scale in one unit
You avoid buying a separate jewelry scale for intake weighing on the same counter.
Best Budget / Runner-Up 600 g Kit
Lissontine Shop-600 g Densimeter
Key takeaways
- Budget path into a full 600 g tank kit
- Shop vs Lab SKUs—match the listing carefully
- Good second option when comparing Amazon kits
Shops comparing 600 g kits with optional print workflow
You hate SKU confusion or only buy light rings
Quick snapshot
Pros
- Shop vs Lab SKUs let you choose resolution tier
- 600 g class fits mixed solid intake
- Many kits mention printer / computer interface
- Useful comparison shop against other 600 g Amazon units
Cons
- Easy to order the wrong Shop vs Lab variant from a messy title
- Brand support depends on the seller
- Print features are not always included—read the box list
- Overkill capacity if you only handle light jewelry
Why we picked it
Why it earns the badge
Lissontine lands as our best budget / runner-up pick in the 600 g band: same capacity story as other shop kits, usually at a price that lets a new pawn counter or second location get a working tank setup without waiting on a premium brand order. We feature it so you can compare two 600 g options side by side instead of marrying the first kit you see on Amazon. Shop vs Lab SKUs also give you a path to finer density resolution later if disputed lots justify the upgrade—without forcing every desk to buy lab decimals on day one.
Who it is ideal for
Ideal for comparison shoppers, managers opening a second bench, and desks that might want printer or PC interface options on some configurations. The 600 g class covers mixed solid intake the same way other shop kits do: solid chains, solid scrap lots, and pieces that would have bounced off a 300 g ceiling. If print/PC mentions matter to your dispute workflow, confirm they are in the exact SKU you are ordering—not just in a related listing photo.
Who should skip it
Skip it if you want one dead-simple SKU with zero ambiguity, or if brand familiarity is a hard requirement for ownership. Title noise is the real risk in this product family: Amazon listings mix Shop and Lab language, capacity numbers, and accessory claims. Ordering the wrong variant is the most common expensive mistake—not a “bad densimeter physics” problem. Also skip it if your intake is only light jewelry; you will pay for capacity you never use.
What real buyers get wrong
What lower-rated densimeter reviews in this price tier actually complain about: unclear manuals, wrong Shop/Lab variant, printer pictured but not included, and operators testing hollow electroformed jewelry. None of those are unique to Lissontine, but they are more common when listings are noisy and buyers rush. Fix it with a slow checkout: match capacity, density resolution, weight resolution, and accessory list line by line, then train staff that solid metal only means solid metal only. Used that way, this kit is a sensible budget path into daily densimetry.
Key specs → desk benefits
Shop 0.001 vs Lab 0.0001 density options
You can pay for finer resolution only when disputed lots justify it—not by default.
Interface / printer mentions on many listings
Helps desks that want a paper trail of the screen for customer disputes.
Buying decision
Confirm tank, hanger, and calibration weight are included on the live listing.
FAQ
How long should I wait before the first test?
Allow ten to fifteen minutes after filling for the water and electronics to settle, longer if the water or the room is very cold or very warm.
Do I need to calibrate a brand-new unit?
Run the supplied calibration weight to confirm the unit matches its specification. Most shops also log a baseline reading with a known item.
Can I use bottled or tap water for setup?
Use distilled water for consistent results. Tap water can carry dissolved gas and minerals that create bubbles and drift.